Lecture Note
Chapter 3: Asymptotic Notations Big O Big Omega and Big Theta Explained
-
University:
Alabama State University -
Course:
CS212 | Introduction to Data Structures and Algorithms Academic year:
2024
-
Views:
160
Pages:
23
Author:
Nitish B.
Related Documents
- Data Regulation
- Assigment for Quicksort Algorithm
- Assembly Implementation for Design Processor Architecture
- DDL In Table
- Database Design Course Materials
- Quiz. Algoritm and Data Structure
- Dual-band SIW Filter
- Compact Cor X Band MIMO Antenna Array
- DDL For Stored Procedure
- Data Retrieval Join
- Child Safety Monitoring System
- Lexible C-band WiFi Antenna
- 5g Mmwave Mimo Antenna Array
- Scope and Importance of Marketing
- Understanding Consumer Behavior and the Basics of Marketing
- The Bond Market
- Design Architecture of Processor
- BInary Search Tree (BST). Assignment
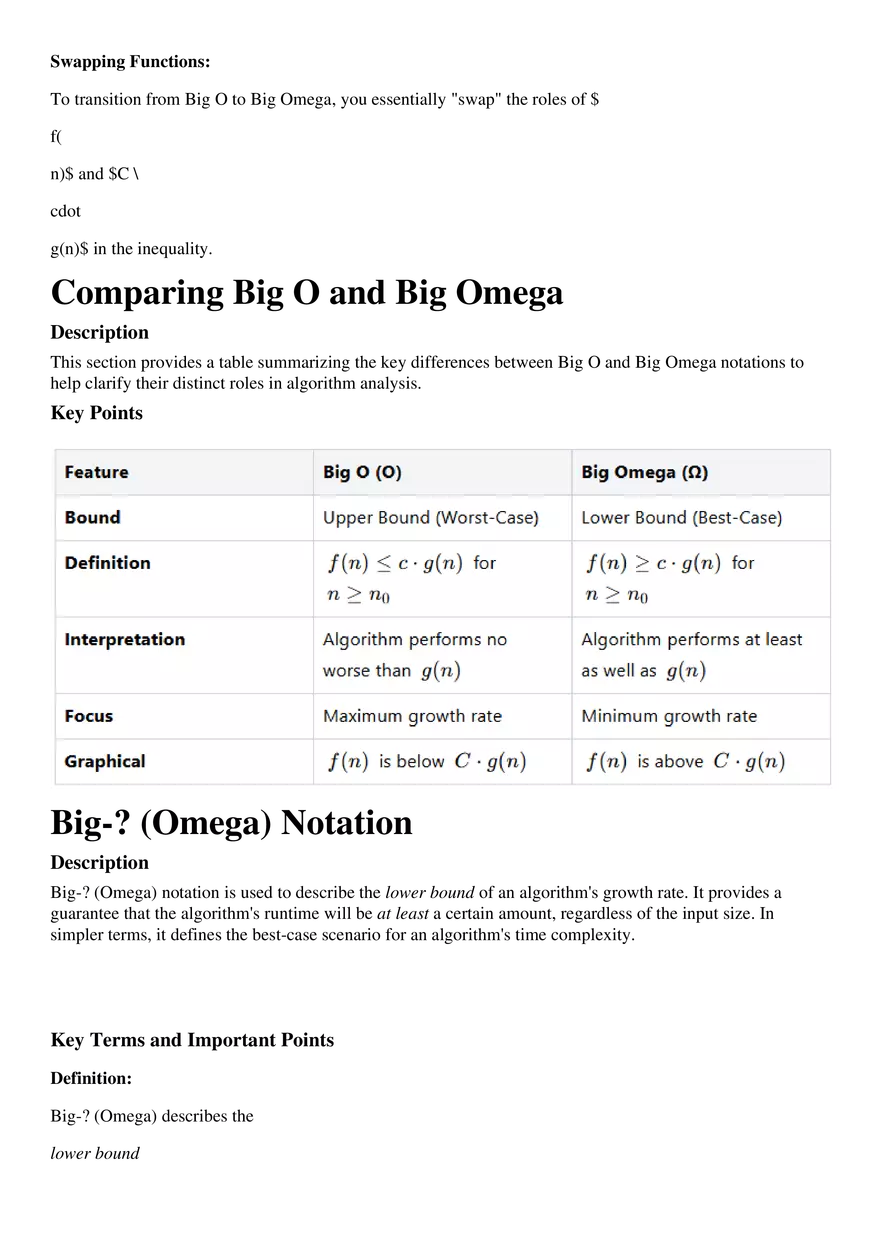
Chapter 3: Asymptotic Notations Big O Big Omega and Big Theta Explained


Recommended Documents


Get your assignment done in just 3 hours. Quick, easy, and available 24/7.


New Documents from this Course

Report
Tell us what’s wrong with it:
Thanks, got it!
We will moderate it soon!
Report
Tell us what’s wrong with it:
Free up your schedule!
Our EduBirdie Experts Are Here for You 24/7! Just fill out a form and let us know how we can assist you.
Take 5 seconds to unlock
Enter your email below and get instant access to your document